Question:
How to use the Dealer card gap adjustment feature – on the Select, Premium and Version 4 dealer (Classic dealer can be upgraded)
Needed when:
For example when the dealer has two cards caught in the gap at the same time (due to too wide/large gap) or when one card is stopped (due to too a narrow gap). Notice: if the cards are damaged – for example, bend corners – the dealer will stop the forward movement of the card automatically.
If the gap is too big you will see an Error type 95 or Error 96. Error type 95 or Error 96 can in most cases be fixed with an adjustment as shown below.
As a result of a the wide gap – you can see two cards dealt as one – in other words if you check the dealt cards with the card distribution (create and play a one-table tournament – or click the checkmark under Game Live “Show Hand Records for Creator” to see the card distribution).
Level:
Advanced – Requires some technical understanding
What do you need:
- Hex key 1,3 mm (also calls an Unbrako key). In NZ it is called an Allen key (included with the dealer – in a small plastic bag)
- Two Bridge+More playing cards
Step one:
At first, make sure the dealer is turned off.
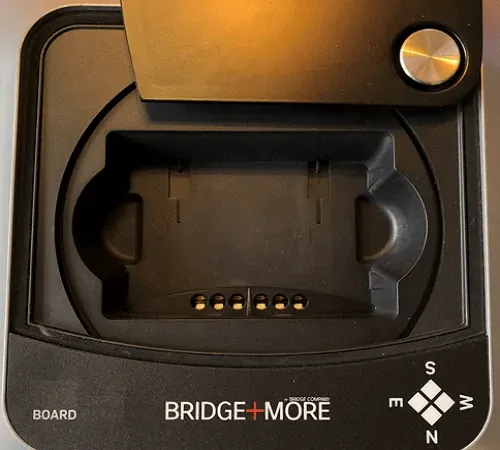
After the shutdown sequence is complete, open the lid.
Make sure the pins marked in the picture are retracted all the way back – else push them carefully backwards until they are positioned as shown with the green circle.
Gap too big
The gap is too big when 2 cards can pass through at the same time.
Gap OK size
The OK gap size is obtained when a single card can freely move through the gap with close to no resistance – but can require a more precise adjustment – see below.
Gap too small
The gap is too small when one card can only move through the gap when extra force is used, or not at all.
Step two:
Please check – does your dealer have the gap adjustment option?
If a little socket screw (hole) can be seen in the core – between holes 4 and 5 – as shown in the left picture, the dealer has the gap adjustment option.
If there is no adjustment option – see the picture – please contact us by an email.
Step three:
The illustration shows a counter-clockwise turn – loosening the screw – thereby increasing the gap and making it easier for one card to pass if too tight
A clockwise turn tightens the screw – hereby decreasing the gap making it difficult even for one card to pass or impossible for two cards to pass.
Don’t ever use a half or full turn of the pinol screw – only do a small fraction of a turn – illustrative turn equal to 2 or 5 minutes of 60 minutes (an hour) – with 60 minutes (an hour) illustrating a full turn.
Step four:
Please gently push the card handling mechanism backwards as illustrated – notice, that the dealer’s core must be positioned as illustrated to be able to move the card handling mechanism all the way backwards as shown in the pictures above with green markings.
Step five:
To find the precise adjustment as illustrated above with a counter-clockwise or a clockwise turn please study the pictures on the right.
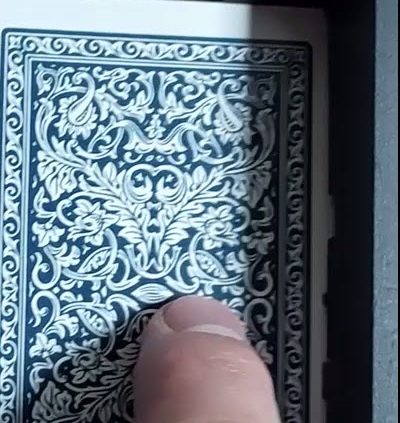
The first picture shows that card (one) is held back by the rubber flap when the push is very gentle – and the second picture shows that card (one) is possible for me to push into the gap when the push with one finger is less gentle.
If needed to adjust the gap based on the Step five test – do an even smaller fraction of a turn – equal to 1 or 2 minutes of 60 minutes (an hour) – with 60 minutes (an hour) illustrating a full turn.
Example of adjusting the card gap
In the video, we start with a dealer that has a gap which is too big.
- We start off by feeling no resistance when pushing the card through the gap.
- When we feel no resistance, we insert the hex key and 5 minutes of a full turn clockwise.
- We proceed until resistance is felt when pushing with one or two fingers a card through the gap.
- When the resistance is there, we slowly move backwards by inserting the hex key and turning a smaller and smaller fraction of a turn counterclockwise
- We continue to do this in appropriate steps until the gap is perfect
- We play some hands with both red and blue cards to check the gap is perfect.
Notice:
To increase the gap, turn counterclockwise (Left) (tighten the screw) – To decrease the gap, turn clockwise (Right) (loosen the screw) – remember very small fractions of turns.
Search tags:
Eject, Eject cards, Manual eject, gap, gap adjustment, card gap, 95, 96, error 95, error 96


 Bridge Company A/S